Modifying Aliases in eZ Account Import
Once aliases are created, there may be a need to modify them. Once modified, the pre-defined payee or account will populate in eZ Account Import during future uses of the application.
1. Navigate to the Alias window by right-clicking on a transaction in the Import Transactions window. Once the Alias menu expands, click Edit.
2. The Aliases window opens:
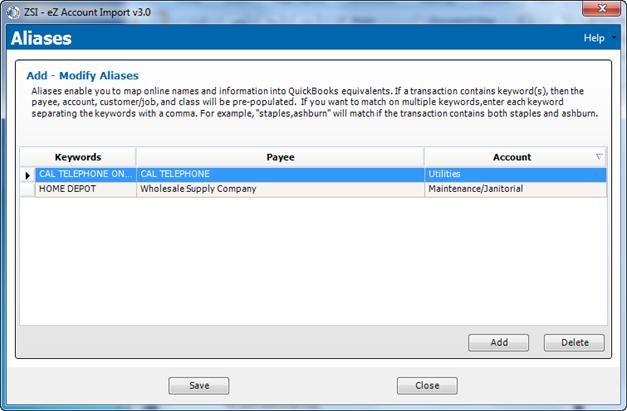 Figure 23:
Aliases window
Figure 23:
Aliases window
3. Modify the elements of the pre-defined alias, as needed.
4. Click Save. The alias is updated.