Registering with QuickBooks Online Edition
1. Select QuickBooks® Online Edition and click Access QuickBooks®. The Setup QuickBooks Online Edition Connection opens. Click the Setup Connection button..
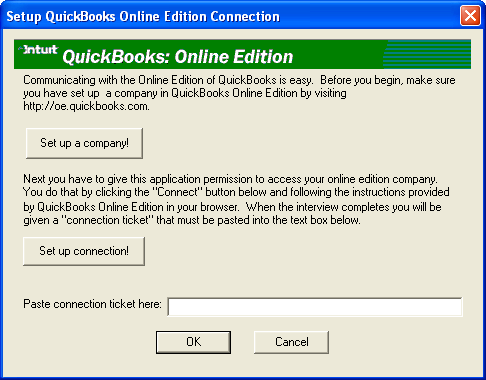
Figure 54: Setup QuickBooks Online Edition Connection window
This window allows you to tell QuickBooks Online Edition that the eZ Credit Card Import will be accessing your company file on QuickBooks Online Edition.
2. Click the Set up Connection! Button and a browser window will be launched directing you to the QuickBooks Online Edition and the setup steps required to establish a connection for eZ Credit Card Import.
3. Note: Do not close this window.
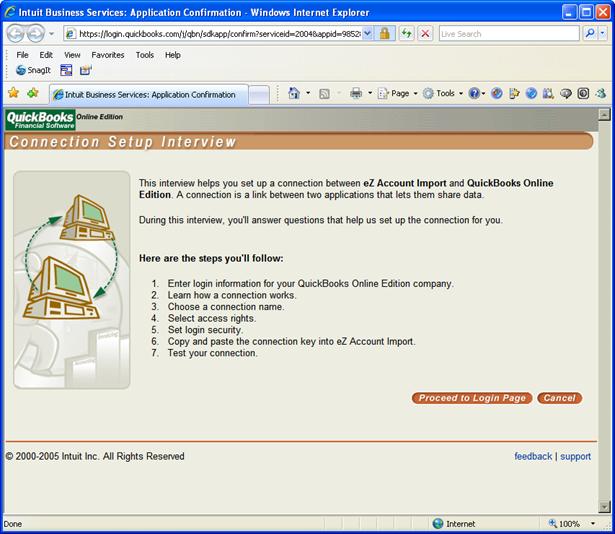
Figure 55: Connection Setup Interview
4. Click Proceed to Login Page link and the QuickBooks Online Login page is displayed.

Figure 56: QuickBooks Online Login Page
5. Enter your credentials and click Login and the How does a connection work? page is displayed.
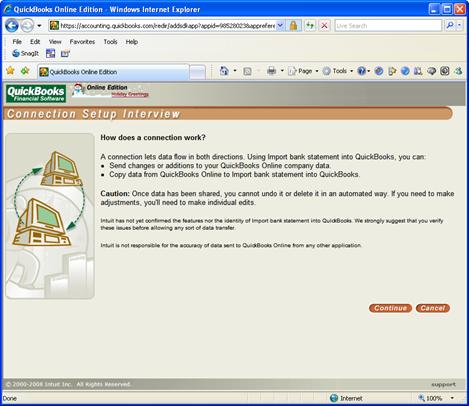
Figure 57: How does a Connection work? Page
6. Click the Continue link and Connection Name page is displayed.
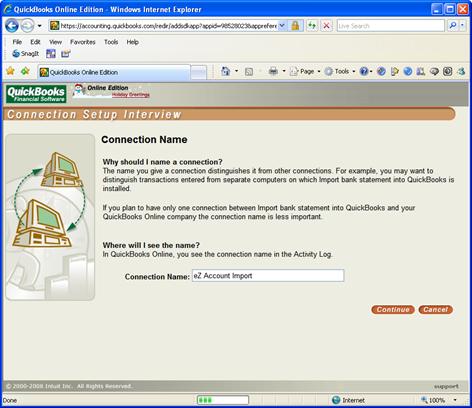
Figure 58: Connection Name page
7. Click the Continue link and the Access Rights page is displayed.
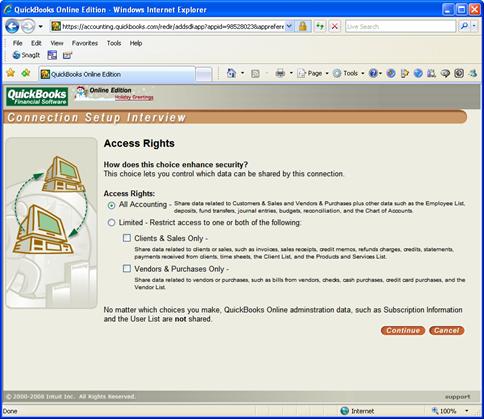
Figure 59: Access Rights page
8. Select All Accounting as the Access Rights and click Continue link. The Login Security page is displayed.
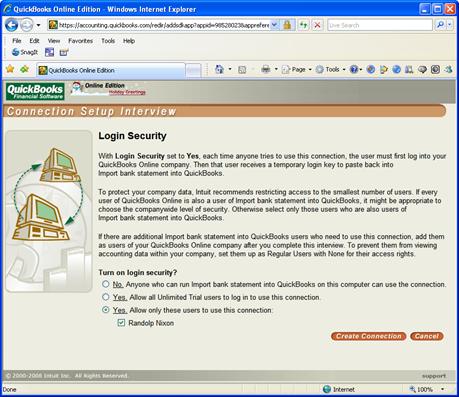
Figure 60: Login Security page
9. Select “Yes. Allow only these users to use this connection” and then the users you want to use eZ Credit Card Import. Click Create Connection link. The Connection Key page is displayed.
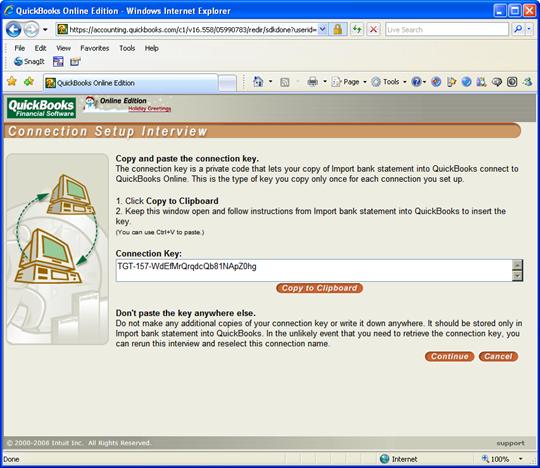
Figure 61: Connection Key page
10. Click Copy to Clipboard link. Then return to Setup QuickBooks Online Edition Connection window. Put your cursor in the Past connection ticket here text entry, right click your mouse and select past. The connection ticket should be displayed in the text entry. If not return to the Connection Key and be sure to copy to your clipboard and repeat the procedure.
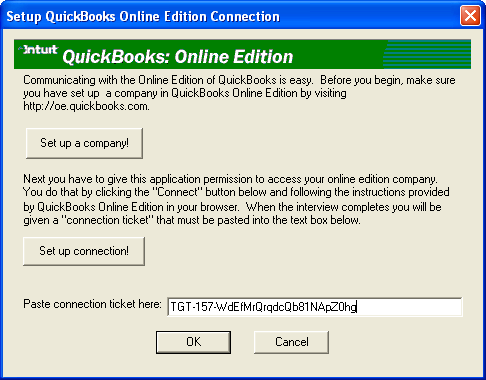
Figure 62: Setup QuickBooks Online Edition Connection window
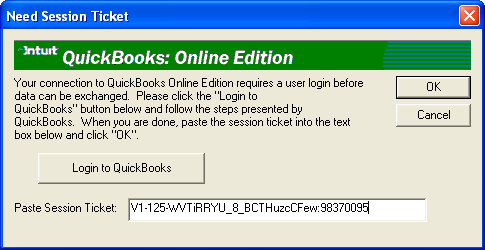
11. Click on the OK button and the Need Session Ticket window is displayed.

Figure 63: Setup QuickBooks Online Edition Connection window
12. Click the Login to QuickBooks button and a browser window will be displayed with the QuickBooks Online Edition Login page displayed.
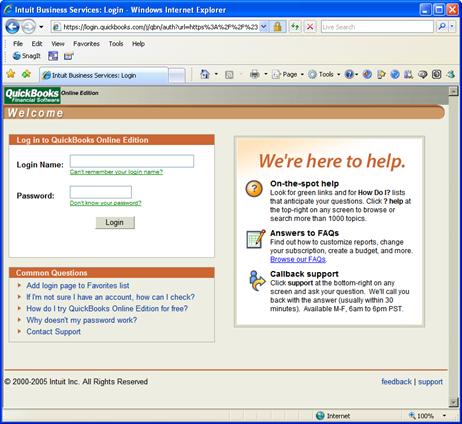
Figure 64: QuickBooks Online Login page
13. Enter your login credentials and click Login button. The Login Security page will be displayed.
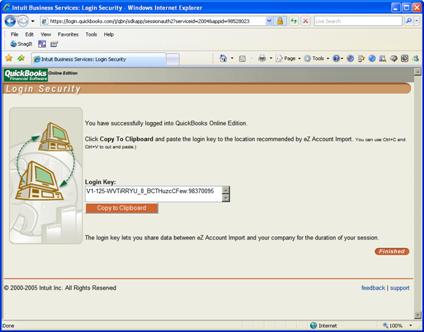
Figure 65: Login Security page
14. Click Copy to Clipboard button and return to the Need Session Ticket window. Put your cursor in the Paste eSession ticket here text entry, right click your mouse and select past. The session ticket should be displayed in the text entry. If not return to the Login Security page and be sure to copy to your clipboard and repeat the procedure.
Note: Steps 16 -18 will be repeated for each use of eZ Credit Card Import. This ensures no-one launches eZ Credit Card Import and has automatic access to your QuickBooks Online Edition information.
15. The following Information window opens:

Figure 66: Demo Information window
16. Click OK. You may now begin using the eZ Credit Card Import system.
Note: Once you have used installed eZ Credit Card Import you have 14 days to test drive the application. After 14 days you must purchase the software.